 Settings
There are a few settings you can change in Duik Bassel to better set it up for your taste.
-
You can set a specific file to store the settings, which will be shared by all instances of Duik (all After Effects versions), and which you can store in a synchronized folder between several computers, to have the same settings everywhere. You can also simply copy this file to any other computer to transfer the settings.
-
You can change the language of Duik to one of the available ones, or you can contribute with your own translation.
-
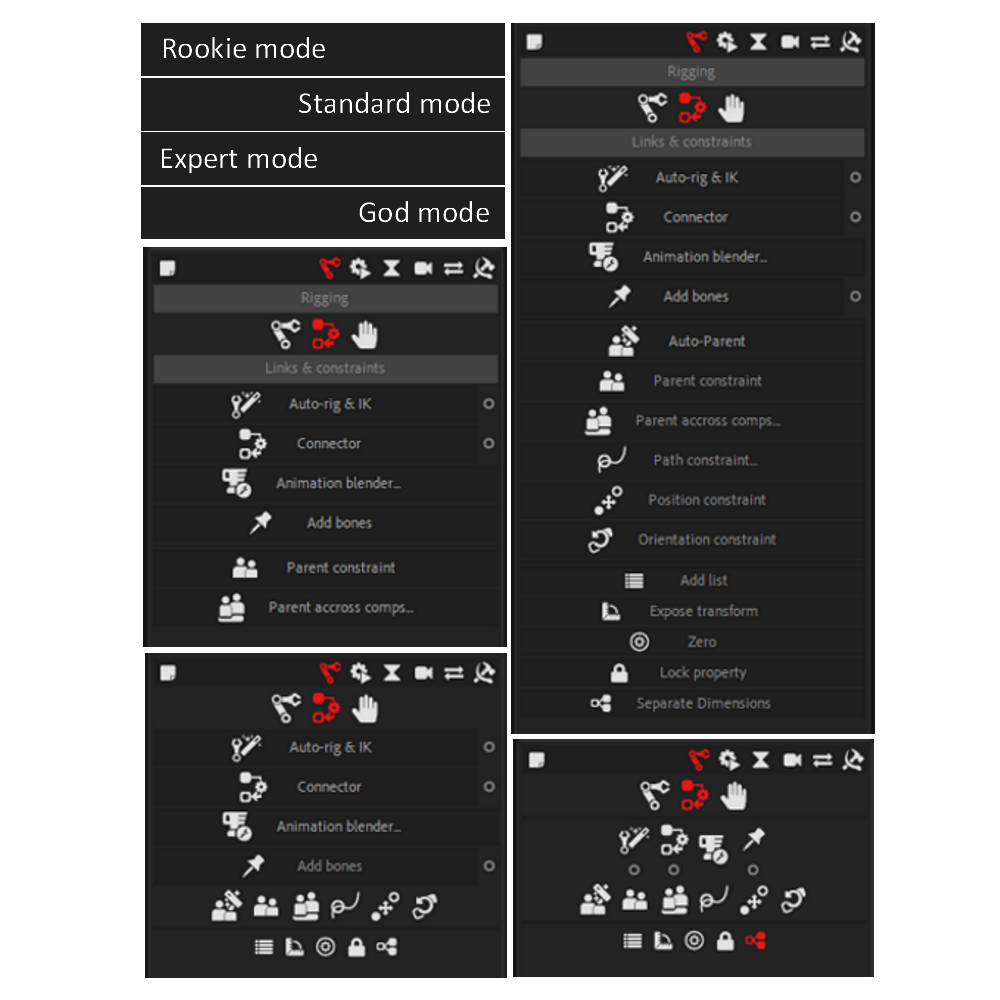
There are four different modes for the user interface, depending on your level:
- Rookie is the simplest one, recommended if this is the first time you use Duik Bassel. Only the most used and simplest tools are available, and the user interface is thought to be as easy to use as possible.
- Standard has all the tools available, in a nice and easy-to-use user interface.
- Expert may be a bit more complex to use as there are less texts to explain what do the buttons do. Some very specific tools (for scripters and expressioners) are only available in this mode.
- God is the smallest mode, made nearly only of icons. This is perfect if you know Duik well and you don’t want the panel to take too much room in your workspace.

-
You can switch between a Normal mode and a Dev & Debug mode. You should always stay in Normal mode unless you’re making changes in the code of Duik or if you have been asked to in order to find the source of a bug.
-
Click on the Apply changes button to apply any change you’ve made in the settings. You can also close and open Duik again if anything seems to go wrong.